In the past I have written about how to integrate Google’s Admob ads into Xamarin.Forms iOS apps and Android apps, which is a great way to monetize your applications. What about UWP? Well Google Admob doesn’t exist on UWP, but Microsoft has their own advertising SDK that you can integrate and it of course works with Xamarin.Forms! Here is what you need to know to get started.
Install the SDK or NuGet
Before we get started, we need to install the official SDK for Microsoft Advertising, which is usually what is recommended.
This works with Visual Studio 2015 & 2017 and is a quick install. However, the better way is simply to install a NuGet into our project. Simply search for Microsoft.Services.Store.SDK. There are guides if you already installed the SDK manually, so read up here.
Add the SDK Reference
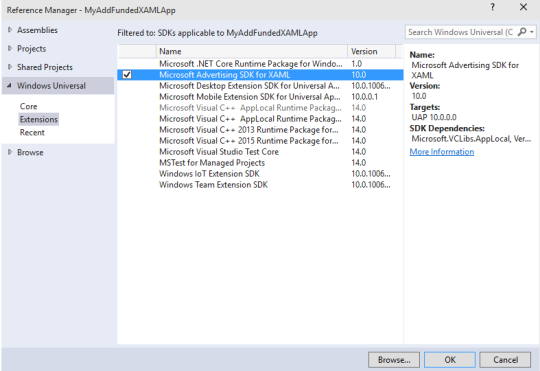
Once the SDK or the NuGet is installed, we can open up our UWP project and add that reference hidden under Windows Universal -> Extensions. It is officially called Microsoft Advertising SDK for XAML:

If you don’t see this, simply close the solution and re-open it.
Create Xamarin.Forms Control
The control itself is super crazy simple and doesn’t do to much besides be a placeholder:
We can immediately add it into our XAML:
Create UWP Custom Renderer
The control API is extremely easy to use. I am using the test IDs here for the application and the test banner id, but those can be created later. All we need to do is create it and set the width and height and we are done!
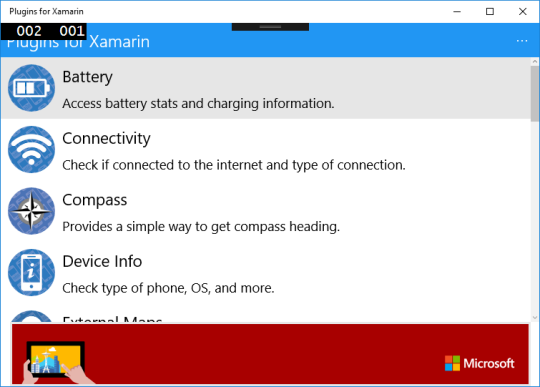
Run it!

Finishing Up & Creating Ad Unit
Now it is time to go and create a real Ad Unit, which you can do in the dev center. Additionally, I would recommend creating different sizes based on your device that you are on, you can read about this in the supported banner ad sizes documentation.


