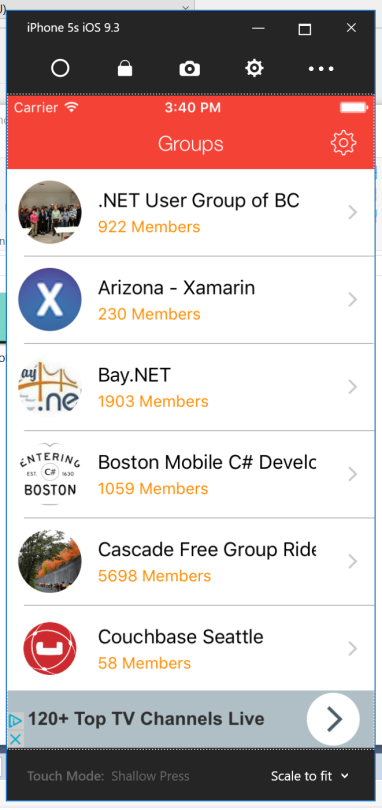
This weekend I spent some time integrating Admob Ads into Android applciations that live in Xamarin.Forms. I blogged about it a few days ago, so read it here first! I decided to take iOS for a spin next and put in Google/Firebase Admob Ads usin teh same exact mechanism. I will repeat a bit of the code here so each post can live on it’s own.
Registring with AdMob
So, the first thing that you will need to do is actually register for AdMob. This is the same thing that I did in Android, but I created an iOS project. This will give you two important pieces of information, your “Application Code” and your “Ad Unit Id”. We will use these later, but simply go to: https://apps.admob.com, register for a new app, link to an app in Firebase, and you will be off running.
Add GoogleService-Info.plist
When you create the new app in Admob/Firebase there will be a Google Service config plist file that gets downloaded. Add this to the root of your iOS project and make sure that the Build Action is set to BundleResource. This is super important!
Downloading NuGet Package
The nice thing about integrating ads in iOS is that we don’t have to worry about Google Play version issues at all. Search for “Xamarin.Google.iOS.MobileAds” and the Xamarin package should be the first one to come up. You can install the latest, which as of today is 7.11.0

Custom Control
For my application I am not adding any custom data bindings or anything like that for the Ad Ids, so I just create a very very very simple custom control in my shared code. This is the same one that is shared with my Android app:
using Xamarin.Forms;

namespace MeetupManager.Controls
{
    public class AdControlView : Xamarin.Forms.View
    {
    }
}
Ad View Renderer
Now, we have to go into our iOS project and implement the custom control. Essentially just a method to create the native AdView and then set it when the page loads up.
using CoreGraphics;
using Google.MobileAds;
using System;
using UIKit;
using Xamarin.Forms;
using Xamarin.Forms.Platform.iOS;
using MeetupManager.UI;
using MeetupManager.Views;

[assembly: ExportRenderer(typeof(MeetupManager.Controls.AdControlView), typeof(MeetupManager.iOS.PlatformSpecific.AdViewRenderer))]
namespace MeetupManager.iOS.PlatformSpecific
{
    public class AdViewRenderer : ViewRenderer<Controls.AdControlView, BannerView>
    {
        string bannerId = "Your Ad Unit Id";
        BannerView adView;
        BannerView CreateNativeAdControl()
        {
            if (adView != null)
                return adView;


            // Setup your BannerView, review AdSizeCons class for more Ad sizes.
            adView = new BannerView(size: AdSizeCons.SmartBannerPortrait,
                                           origin: new CGPoint(0, UIScreen.MainScreen.Bounds.Size.Height - AdSizeCons.Banner.Size.Height))
            {
                AdUnitID = bannerId,
                RootViewController = GetVisibleViewController()
            };

            // Wire AdReceived event to know when the Ad is ready to be displayed
            adView.AdReceived += (object sender, EventArgs e) =>
            {
                //ad has come in
            };


            adView.LoadRequest(GetRequest());
            return adView;
        }

        Request GetRequest()
        {
            var request = Request.GetDefaultRequest();
            // Requests test ads on devices you specify. Your test device ID is printed to the console when
            // an ad request is made. GADBannerView automatically returns test ads when running on a
            // simulator. After you get your device ID, add it here
            //request.TestDevices = new [] { Request.SimulatorId.ToString () };
            return request;
        }

        ///
        /// Gets the visible view controller.
        ///
        /// The visible view controller.
        UIViewController GetVisibleViewController()
        {
            var rootController = UIApplication.SharedApplication.KeyWindow.RootViewController;

            if (rootController.PresentedViewController == null)
                return rootController;

            if (rootController.PresentedViewController is UINavigationController)
            {
                return ((UINavigationController)rootController.PresentedViewController).VisibleViewController;
            }

            if (rootController.PresentedViewController is UITabBarController)
            {
                return ((UITabBarController)rootController.PresentedViewController).SelectedViewController;
            }

            return rootController.PresentedViewController;
        }

        protected override void OnElementChanged(ElementChangedEventArgs e)
        {
            base.OnElementChanged(e);
            if(Control == null)
            {
                CreateNativeAdControl();
                SetNativeControl(adView);


            }
        }
    }
}
Update AppDelegate
Go into your AppDelegate.cs file and initialize your MobileAds from the SDK in the FinishedLaunching method:
MobileAds.Configure("Your Publishing App Id");
Update XAML
Now we can add the custom control to the bottom of your XAML.
First add your custom xmlns name space:
xmlns:controls="clr-namespace:MeetupManager.Controls;assembly=MeetupManager"
Then add in the custom control and boom done!
Success!
You should now be able to run your app and boom! Test Ad!

This of course was just a smart banner, but you could extend it even further and try out the other ads with custom renderers and of course be sure to add different banner Ids based on the page that you are on.!
Looking to add AdMob ads to Android apps? I have you covered in my next blog found here.


