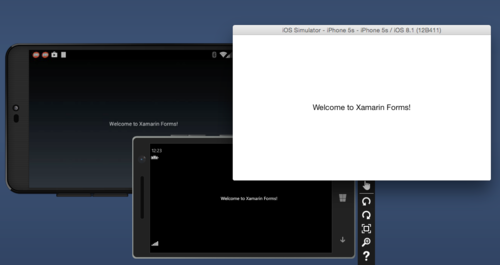
During this weeks Xamarin.Forms 1.3 webinar I received an interesting question about how you can force your mobile applications to always use a specific orientation. This is actually easy to accomplish on each platform with just a few settings in each project. Let’s take a look:

Android
First thing to do is open up your MainActivity.cs file. At the very top you will see an [Activity] attribute. This attribute is used to describe your activity to the AndroidManifest file that is built for you automatically. It is worth taking the time to look into all of these settings on the Google Documentation site. However, what we will want to add here is a new settings called ScreenOrientation and set it to landscape:
ScreenOrientation = ScreenOrientation.Landscape
So your entire Activity attribute would look like this:
[Activity(Label = "App4", Icon = “@drawable/icon”, MainLauncher = true, ConfigurationChanges = ConfigChanges.ScreenSize | ConfigChanges.Orientation, ScreenOrientation = ScreenOrientation.Landscape)]
iOS
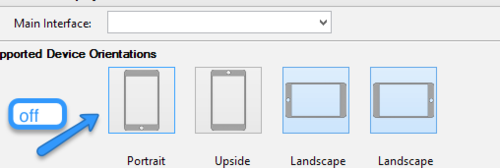
iOS is actually extremely easy to change. Simply right click on your project and go to properties. This will bring up all of the settings for your iOS application and you will want to click on iOS Application, which is a visual representation of your Info.plist. You will see Supported Device Orientations, and you just need to turn off Portrait and you are all set.

Windows Phone
Our last platform will be Windows Phone, which is also easy to get into landscape mode. Open up your MainPage.xaml first and you will see two properties called
SupportedOrientations
and
Orientation
Let’s set both of these to Landscape. Additionally, Xamarin.Forms adds a bit of code into the MainPage.xaml.cs uder InitialzeComponent();, which you need to DELETE:
SupportedOrientations = SupportedPageOrientation.PortraitOrLandscape;
There you have it! Now your app is always in landscape mode. Here is a video if you want a full walk through:


