It is a tale as old of time fighting with Android elevation and drop shadows. First it was the Toolbar on a Navigation page and now it is the new fancy bottom tabs that we got in Xamarin.Forms 3.1. I know what you are thinking... another custom renderer... NOPE! You just have to know to set a few different properties correctly.

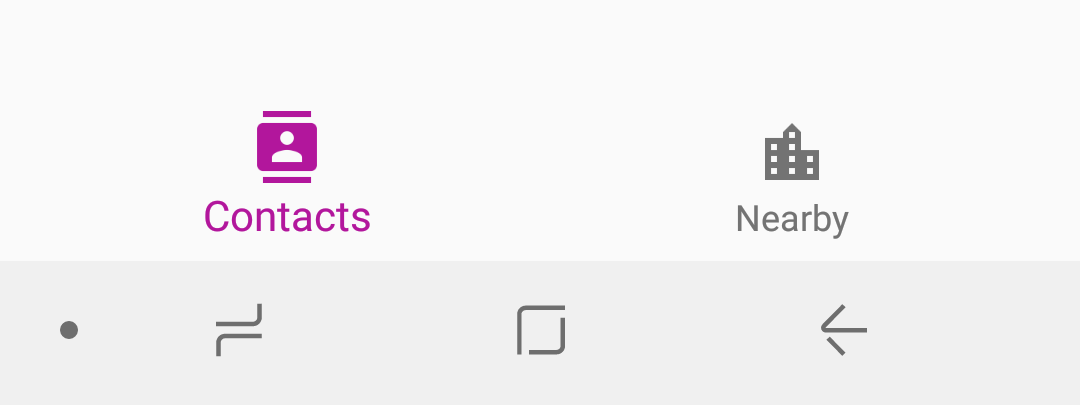
Here is what we are starting with:
<TabbedPage xmlns="http://xamarin.com/schemas/2014/forms"
             xmlns:x="http://schemas.microsoft.com/winfx/2009/xaml"
             xmlns:android="clr-namespace:Xamarin.Forms.PlatformConfiguration.AndroidSpecific;assembly=Xamarin.Forms.Core"
             android:TabbedPage.ToolbarPlacement="Bottom"
             x:Class="GeoContacts.View.HomePage">
<!-- Pages Here-->
</TabbedPage>
As we can see there is no fancy shadow or elevation :(

That Background Color!
The BottomNavigationView is a tricky beast regardless if you are in Android XML or Xamarin.Forms. To get a drop shadow/elevation on it you MUST set the background color! It is true, I even mentioned it way back in August 2017 when I wrote my original blog on it. All we need to do is set the background color on our TabbedPage and we are set:
BarBackgroundColor="{OnPlatform Android=White}"
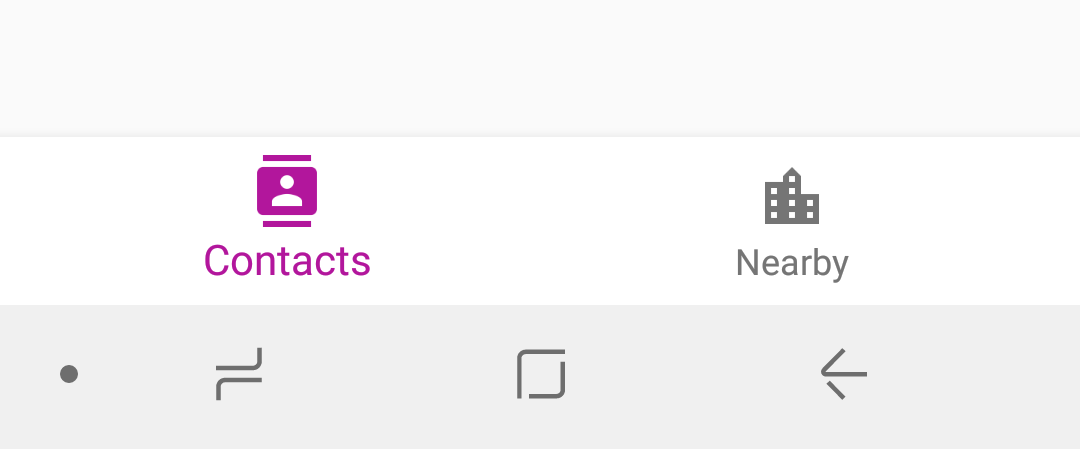
And here we go:

That is literally it! You can of course set it to any color you would like and you should still see a nice shadow appear to separate out your content. Now if for some reason you have to support a really really old device that doesn't support elevation, then you will have to do some custom work here. Don't worry as you can custom render it :)
Custom Android Layouts & Renderer
To do this manually you will need to create 2 resource files:
- Resources/drawable/shadow.xml
- Resource/layout/view_shadow.axml
The shadow.xml is a very simple reverse gradient:
<?xml version="1.0" encoding="utf-8" ?>
<shape xmlns:android="http://schemas.android.com/apk/res/android">
    <gradient
        android:startColor="#1F000000"
        android:endColor="@android:color/transparent"
        android:angle="90" />
</shape>
For the view_shadow.axml this is just a dummy view with the background set to shadow.
<View
    xmlns:android="http://schemas.android.com/apk/res/android"
    android:layout_width="match_parent"
    android:layout_height="4dp"
    android:background="@drawable/shadow"/>
Now, it is time for our custom renderer inside of our Android project. This code is actually very simple and just injects the view_shadow onto the top of our navigation view:
using Android.Views;
using Xamarin.Forms.Platform.Android.AppCompat;
using Xamarin.Forms.Platform.Android;
using Android.Support.Design.Widget;
using Android.Content;
using Android.Widget;

[assembly: ExportRenderer(typeof(TabbedPage), typeof(MyTabsRenderer))]
namespace GeoContacts.Droid
{
    public class MyTabsRenderer : TabbedPageRenderer
    {
        public MyTabsRenderer()
        {

        }
        public MyTabsRenderer(Context context)
        {

        }

        protected override void OnElementChanged(ElementChangedEventArgs<Xamarin.Forms.TabbedPage> e)
        {
            base.OnElementChanged(e);

            if (!(GetChildAt(0) is ViewGroup layout))
                return;

            if (!(layout.GetChildAt(1) is BottomNavigationView bottomNavigationView))
                return;

            var topShadow = LayoutInflater.From(Context).Inflate(Resource.Layout.view_shadow, null);

            var layoutParams =
                new Android.Widget.RelativeLayout.LayoutParams(LayoutParams.MatchParent, 15);
            layoutParams.AddRule(LayoutRules.Above, bottomNavigationView.Id);

            layout.AddView(topShadow, 2, layoutParams);

        }
    }
}
There you have it! Regardless of your implementation the shadow adds some nice flare and takes minimal effort.


