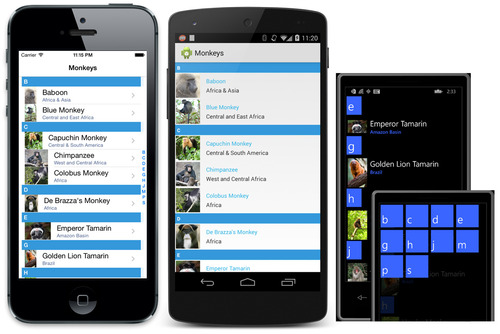
Sometimes a plain ListView just isn’t good enough. You can easily spice it up with images or custom cells, but what about organizing the data. With C# and LINQ it is easy to sort your list, but how about giving it some visuals? How about some headers? With Xamarin.Forms it is extremely simple to add in headers and to create a custom view as well.

I am working out of my Xamarin.Forms-Monkeys project that I have blogged about before, which consists of a nice list of Monkeys with Images. You can browse this code on my GitHub.
Bindable Group Structure
There are a few examples of using headers with Xamarin.Forms, but I wanted to create an ultimate “Group” that would allow me to sort, organize any data, and that is when I came up with Grouping:Grouping seems simple, but is very extensible, especially if using data binding. Notice that a Grouping is really just an ObservableCollection of type T. However, each Grouping also has a Key. Now this key is of type K, which means it could be anything including a complex data structure. This means you could in theory bind your header to a data structure of K and then bind multiple controls to multiple properties, which is very cool. For this example though we will just make K a string for sorting.
Sorting Our Monkeys
Before we get to our Monkeys we will create a new new public ObservableCollection<Grouping<string,Monkey> > MonkeysGrouped{get;set;} in our ViewModel. The reason for this is that we actually have multiple lists, which is a list of a list of grouped monkeys. Then we will add a new property to our monkey that we can use for sorting, which will be a name sort property:And now we can sort our list of Monkeys in our view model, which we will set as the ItemsSource on our list view:
Enabling Headers
Enabling headers is very simple. There are a few properties to set on the ListView itself to get things going. First is to enable grouping, and then to set the property that the headers will bind to:list.ItemsSource = viewModel.MonkeysGrouped;
list.IsGroupingEnabled = true;
list.GroupDisplayBinding = new Binding("Key"); //this is our key property on grouping.
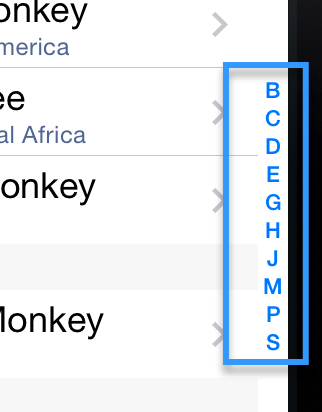
Jump List
Of course, we could stop there, but what fun would that be, as we can add a jump list with just a single line of code:list.GroupShortNameBinding = new Binding("Key");
This results in a nice jump list:
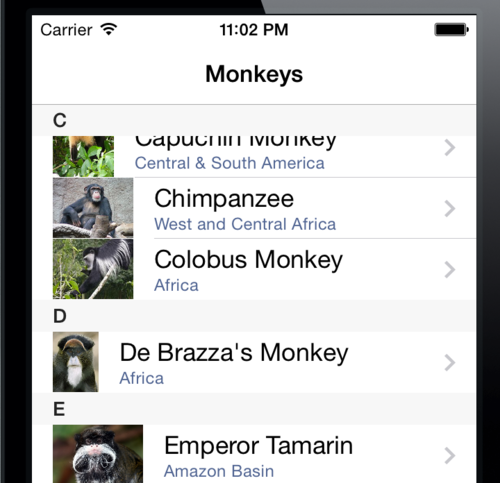
Custom Headers
Let’s take it one step further and implement our own custom header cell with a nice background color. Right now our Key, K, is only a string, but we could pass in a full data structure if we wanted to make the custom view more complex and bind to multiple pieces of information.My HeaderCell is very simple and just contains a Label, which binds to Key and I am placing it inside of a StackLayout with a bit of custom padding and a background color. It should be noted that I am setting a fixed Height of 25 here as the Xamarin.Forms ListView needs to know what to render.
The last thing to do is to update the the ListView with this new template:
if(Device.OS != TargetPlatform.WinPhone)
  list.GroupHeaderTemplate = new DataTemplate(typeof(HeaderCell));

list.HasUnevenRows = true; //you might want to enable if using custom cells.
We don’t set it on Windows Phone because the default styling is standard on Windows Phone with accent colors. However, you can customize it here as well. Here is our outcome on all three platforms: