
I am no UI expert that is for sure, but I really like what Michael James did with the iOS version of My StepCounter. He made a nice background that changed colors from Red to Green, had a chromeless UI, and utilized very nice fonts. I want to take advantage of some of the work he did and also customize it for android.
Transparent ActionBar
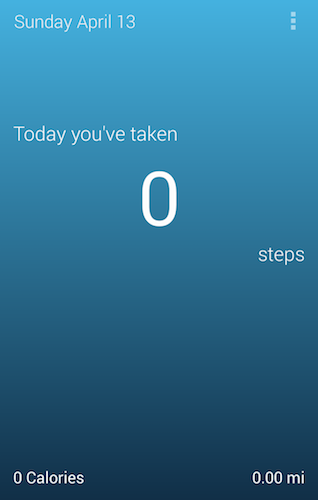
I Wanted to ensure that the full screen was being utilized for this app, but still wanted to take advantage of the unique actions that I can put in the ActionBar. Luckily Android is highly customizable with styles and themes. To create a transparent actionbar you need to override your themes.ActionBar style and give the android:background and android:backgroundStacked a transparent colors. Additionally I wanted to only show the title and then style the TextStyle to be a bit larger and also use a sans-serif-light.This bit of code results in a stunning and beautiful look:

Pretty Fonts
I was really impressed with the font selection and usage on the iOS version and I wanted to bring that over to Android. Since I am targeting Android 4.4 I can use all of the nice Roboto fonts built in. If I was targeting an older version I could have used my Roboto.TextView control, however all I need to do is set the android:fontFamily to:- san-serif
- sans-serif-light
- sans-serif-condensed
- sans-serif-thin
These are all great fonts and when combined with a nice background I get a nice visual look:
Fancy Background
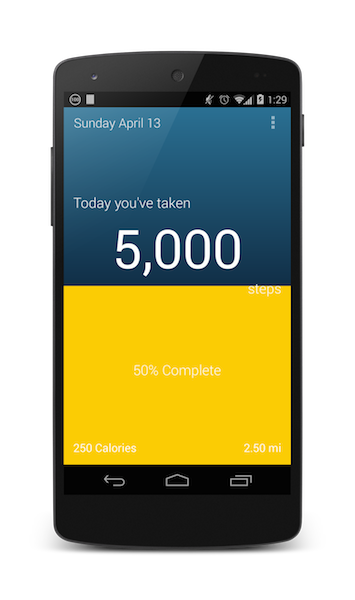
In the iOS version Michael created a custom ProgressView that would change the background RGB based on the percentage that you passed into it. I was actually able to re-use nearly all of this code and put it into a shared file. The main difference was just what property I was settings and how I was creating a new color:As we can see I have to do a lot of #if defs, but it is nice to re-use all of this RGB arrays so we get the same color on the device. The screenshot I showed earlier you saw a blue background, but what I didn’t show you was how I created this. What I actually did was make my root view the ProgressView, which is a FrameLayout, and then I overlaid another FrameLayout with a blue background on it.
This blue frame layout will be animated later, but here are a few screen shots of what the progress view looks like as I move it:
No Boundaries
After having a few people test out the app I got some instant feedback, which was that I should extend the views up to the System Bar and Navigation Bar. This is a brand new feature in Android 4.4 so why not take advantage of it! It was actually really simple. The first thing I needed to do was add android:windowTranslucentNavigation=“true” and android:windowTranslucentNavigation=“true” to my style:Now to ensure that any content on the bottom of the screen didn’t overlap there is an important property to set, which is: android:fitsSystemWindows=“true”. I had to wrap my two text views in a FrameLayout which is where I set this property:
And here you have it the final UI:
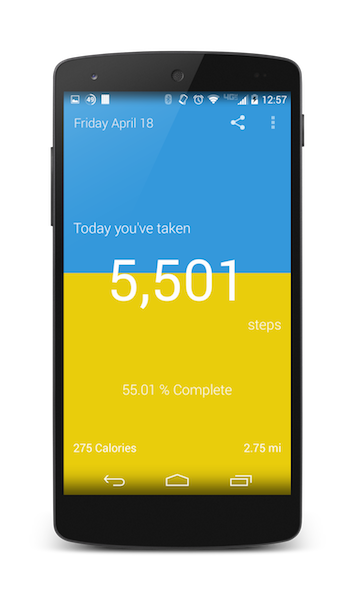
So there is my base UI with the same ProgressView that we are using on iOS now on Android with pretty fonts as well. Next up is Animations!