
Update Xamarin.Forms now includes Pull To Refesh out of the box. Please read my article on it.
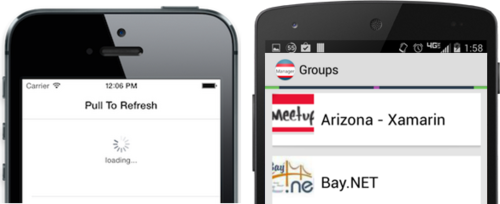
It is true that I absolutely love cross platform settings for mobile applications built with Xamarin. However, there is something that I love even more… Pull To Refresh!
It all started over year ago when I blogged about how to add a UIRefreshControl to MVVMCross iOS apps. Google then introduced an official SwipeRefreshLayout for Android , so naturally I blogged about adding this new layout to your MVVMCross Android applications. With the release of Xamarin.Forms to build iOS, Android, and Windows Phone apps UIs from one shared C# code base things got a little bit more interesting. Since everything was shared logic even for the UI you had to do a little bit more work to get pull to refresh working on iOS with a custom renderer and view. Yet again I got the source code up and running and blogged about it as well. I am back for a fourth blog after much effort, work, and help from Jason to get a Pull To Refresh for Xamarin.Forms Android apps :)
Getting Started
There are a few things to understand about the SwipeRefreshLayout and also about Xamarin.Forms before we get started. The SwipeRefreshLayout is part of the Support v4 Library, which you can find on NuGet, and at it’s core it is just a ViewGroup and acts as a FrameLayout that you can add Android Views to it. You can read all about it’s properties on Google’s Android documentation website. On the Xamarin.Forms side of things there is a great extensibility model using custom renders to customize controls or add your own controls to Xamarin.Forms. So using this concept I thought it would be a nice idea to use a ContentView as my base control to inherit from and add bindable properties to trigger a refresh and execute a refresh command. This will look very similar to the iOS version except that I had inherited from a ListView for iOS:
Custom Renderer
Normally you would pick from a set of pre-built Renderers that are built into Xamarin.Forms to do your customizations. Or you can inherit from a ViewRenderer for a custom view, which is really nice. The issue here is that we will need access to add and remove Child views from the SwipeRefreshLayout. So, while these base Renderers provide a lot of great things built into the framework such as handling most of the property changes, the issue we will run into is there is no ContentViewRenderer and even using a ViewRenderer we will not be able to accomplish our goal (trust me I have tried). This is when Jason led me onto Xamarin.Forms capability of doing everything yourself by subclassing SwipeRefreshLayout itself and implementing IVisualElementRenderer, which is an interface that enables you to make any control a Xamarin.Forms control.
public class FormsSwipeRefreshLayout : SwipeRefreshLayout,
		IVisualElementRenderer,
		SwipeRefreshLayout.IOnRefreshListener
The caveat here is that you have do ALL of the manual work to set it up and get it working. There are a few helpers though to get you going and once you understand how it actually works it is really simple to create them.
IVisualElementRenderer Implementation
Here is our default implementation of IVisualElementRender:
Now this might look a little scary, but let’s break it down one step at a time. SetElement is actually the largest amount of work. This is where we will setup the control and register for property change events. This method will also fire off the ElementChanged event whenever it is called. In this instance we only ever want to initialize once and we will save the “ViewGroup” that is added as the ContentView to our Xamarin.Forms control so we can add it later on.
The rest of the code is actually really simple and is just a bunch of getters and setters since we already set most of this up in the SetElement Method. The only real work we need to implement is measure any children that we have added as sub views:
Almost there!
With this code in place we are basically done, but we will run into a few issues when we run the sample because the SwipeRefreshLayout doesn’t actually know when it is allowed to be pulled or when it should disable itself. The CanChildScrollUp method of the SwipeRefreshLayout is what handles this, and it usually expects a ListView or ScrollView to be the first child, however there seems to be some quirks with how Xamarin.Forms is laying out the controls (or maybe how we are). So, we just need a bit of logic to tell the SwipeRefreshLayout when the ListView is allowed to scroll up.
That’s it! With the refresh control in place we can now add this into our shared code to see it in action!
Limitations
Mostly, this is really proof of concept and I need to do a bit more work to really make it bullet proof. It is extremely functional, but here are the current limitations.- Only works with ListView set as Content of ContentView
- IsRefreshing Binding only goes 1 way from ViewModel down to Control (will be fixed in 1.3.X of Xamarin.Forms)
- You must manually SetColorSchemeResources in code behind (no bindings here yet, but I accept PRs)
- No support for other normal bindable properties of a ContentView such as BackgroundColor (again, I support PRs)