For nearly four years now I have been using my cross-platform settings plugin to save preferences across all the different platforms. Ever since I pushed it up to NuGet it has been extremely popular with over 18,000 installs! The plugin gives you a very simple way of saving out native settings from shared code. Usually, you will create a native UI for each platform and in the case of Android use the PreferenceActivity to automagically create a settings page from XML (which is magical), but what if you are using Xamarin.Forms and want to databind stuff up? This is the exact question I got over on StackOverflow. Of cource you can, let’s do it.
Given this Settings Class:
public static class Settings
{

    private static ISettings AppSettings
    {
        get
        {
            return CrossSettings.Current;
        }
    }

    const string CountKey = "count";
    private static readonly int CountDefault = 0;


    public static int Count
    {
        get { return AppSettings.GetValueOrDefault(CountKey, CountDefault); }
        set { AppSettings.AddOrUpdateValue(CountKey, value); }
    }
}
Approach 1: Essentially you need to create a view model with a public property that you wish to data bind to and then call into settings from there and raise a property changed notification if the value changed. Your Settings.cs can stay the same but you will need to create the viewmodel such as:
public class MyViewModel : INotifyPropertyChanged
{

    public int Count
    {
        get { return Settings.Count; }
        set
        {
            if (Settings.Count == value)
                return;

            Settings.Count = value;
            OnPropertyChanged();
        }

    }

    private Command increase;
    public Command IncreaseCommand
    {
        get
        {
            return increase ?? (increase = new Command(() => Count++));
        }
    }

    public event PropertyChangedEventHandler PropertyChanged;

    public void OnPropertyChanged([CallerMemberName]string name = "")
    {
        var changed = PropertyChanged;
        if (changed == null)
            return;
        changed(this, new PropertyChangedEventArgs(name));
    }

}
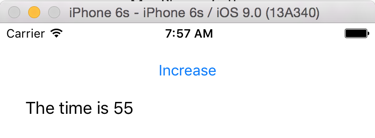
Then you XAML will look like this inside your Content page:
<StackLayout Padding="25">
 <Button Text="Increase" Command="{Binding IncreaseCommand}"/>
 <Label Text="{Binding Count, StringFormat='The count is {0:F0}'}"/>
</StackLayout>
Make sure you set the BindingContext in the xaml.cs of the page:
public partial class MyPage : ContentPage
{
    public MyPage()
    {
        InitializeComponent();
        BindingContext = new MyViewModel();
    }
}
This actually isn’t too much code to actually implement as your ViewModel would have a BaseViewModel that implements INotifyPropertyChanged, so really you are just adding in
public int Count
{
    get { return Settings.Count; }
    set
    {
        if (Settings.Count == value)
            return;

        Settings.Count = value;
        OnPropertyChanged();
    }
}
Approach 2: More magical way
However, using the powers of C# and knowing how Databinding works you could first create a BaseViewModel that everything will use:
public class BaseViewModel : INotifyPropertyChanged
{
    public Settings Settings
    {
        get { return Settings.Current; }
    }
    public event PropertyChangedEventHandler PropertyChanged;

    public void OnPropertyChanged([CallerMemberName]string name = "")
    {
        var changed = PropertyChanged;
        if (changed == null)
            return;
        changed(this, new PropertyChangedEventArgs(name));
    }
}
Notice my reference to Settings.Current, we will need to implement that now as a singleton, but we will use our BaseViewModel so we don’t have to re-implement INotifyPropertyChanged:
public class Settings : BaseViewModel
{
    static ISettings AppSettings
    {
        get
        {
            return CrossSettings.Current;
        }
    }

    static Settings settings;
    public static Settings Current
    {
        get { return settings ?? (settings = new Settings()); }
    }

    const string CountKey = "count";
    static readonly int CountDefault = 0;

    public int Count
    {
        get
        {
            return AppSettings.GetValueOrDefault(CountKey, CountDefault);
        }
        set
        {
            if (AppSettings.AddOrUpdateValue(CountKey, value))
                OnPropertyChanged();

        }
    }
}
Now of course we will still want to create a unique ViewModel that our XAML view will bind to:
public class MyViewModel : BaseViewModel
{
    private Command increase;
    public Command IncreaseCommand
    {
        get
        {
            return increase ?? (increase = new Command(() => Settings.Count++));
        }
    }
}
Notice that we are now inheriting from BaseViewModel, which means our command can actually just increment Settings.Count! But now we must adjust our Xaml just a bit as to what we are actually data binding to for our label:
<StackLayout Padding="25">
 <Button Text="Increase" Command="{Binding IncreaseCommand}"/>
 <Label BindingContext="{Binding Settings}" Text="{Binding Count, StringFormat='The count is {0:F0}'}"/>
</StackLayout>
Notice I am setting the BindingContext to our Settings, which is in our BaseViewModel for the Label, this must be done because that is where it is located now. And there you have it.