
I could not be more excited for .NET Core 3 that will soon power all of your WPF and WinForms apps in addition to ASP.NET Core and .NET Core apps themselves! You may be saying... James... WPF... WinForms... why even bother? Well, because you may have to support some older apps and with the power of .NET Core 3 as the runtime instead of the .NET Framework it means that we no longer have to worry about what version of .NET is installed on the users machine. It means we can deploy a WPF/WinForms app just by running a .exe on any machine, as the runtime is built right in. Checkout all the details here.
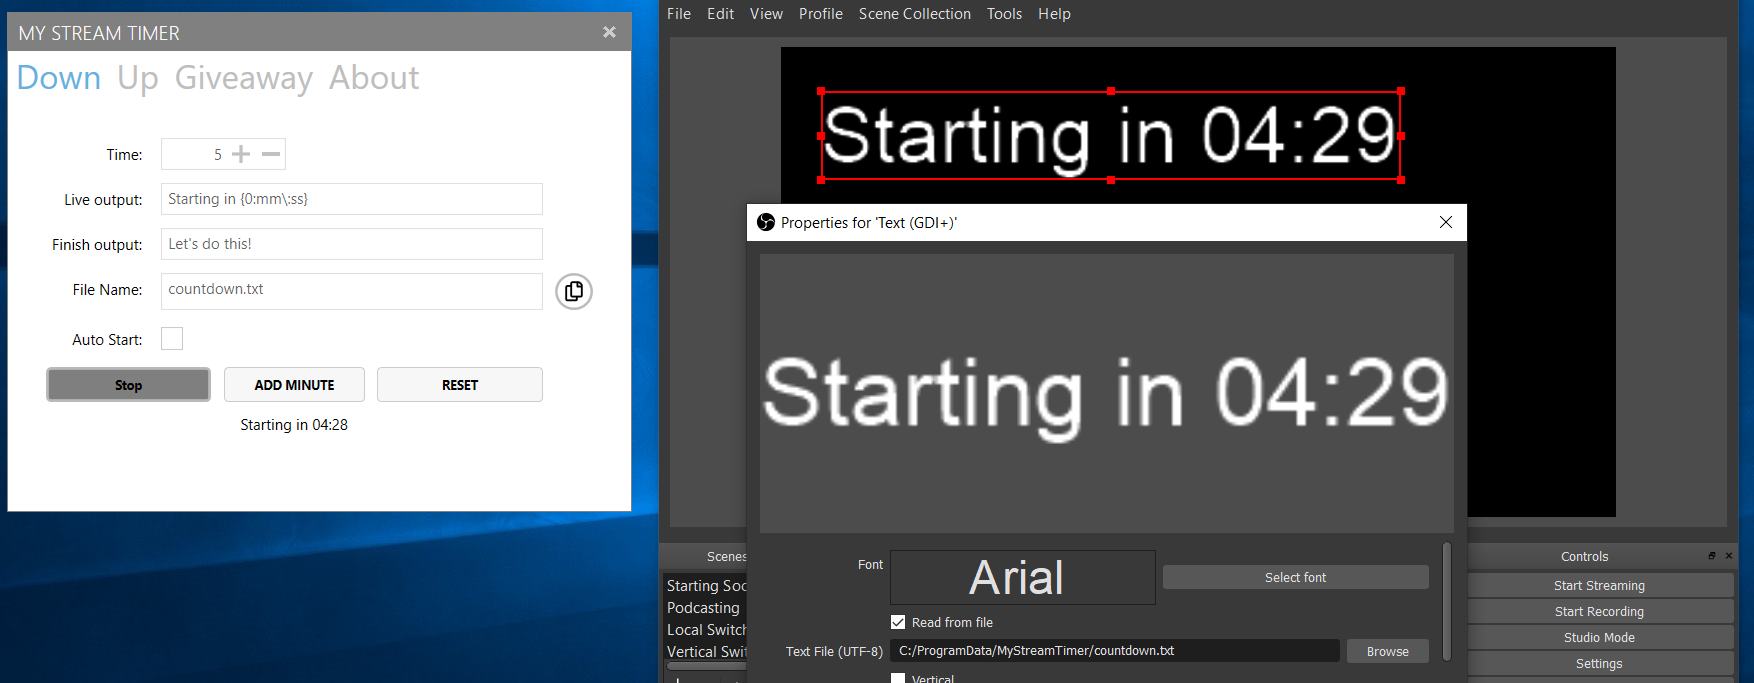
I recently had an idea for a new application for my Twitch stream that I could use when I needed to display a countdown timer. I decided that I should give WPF on .NET Core 3 a try and within a few hours, My Stream Timer was born! Watch the streams here and here,
After I finished up most of the app the tough question started to sink in... how do I distribute and do automatic updates to the app. I know that Squirrel is a super popular way of doing it, but I wasn't sure if it supported .NET Core 3. So I tweeted the question out and within a few minutes was sent towards MSIX.
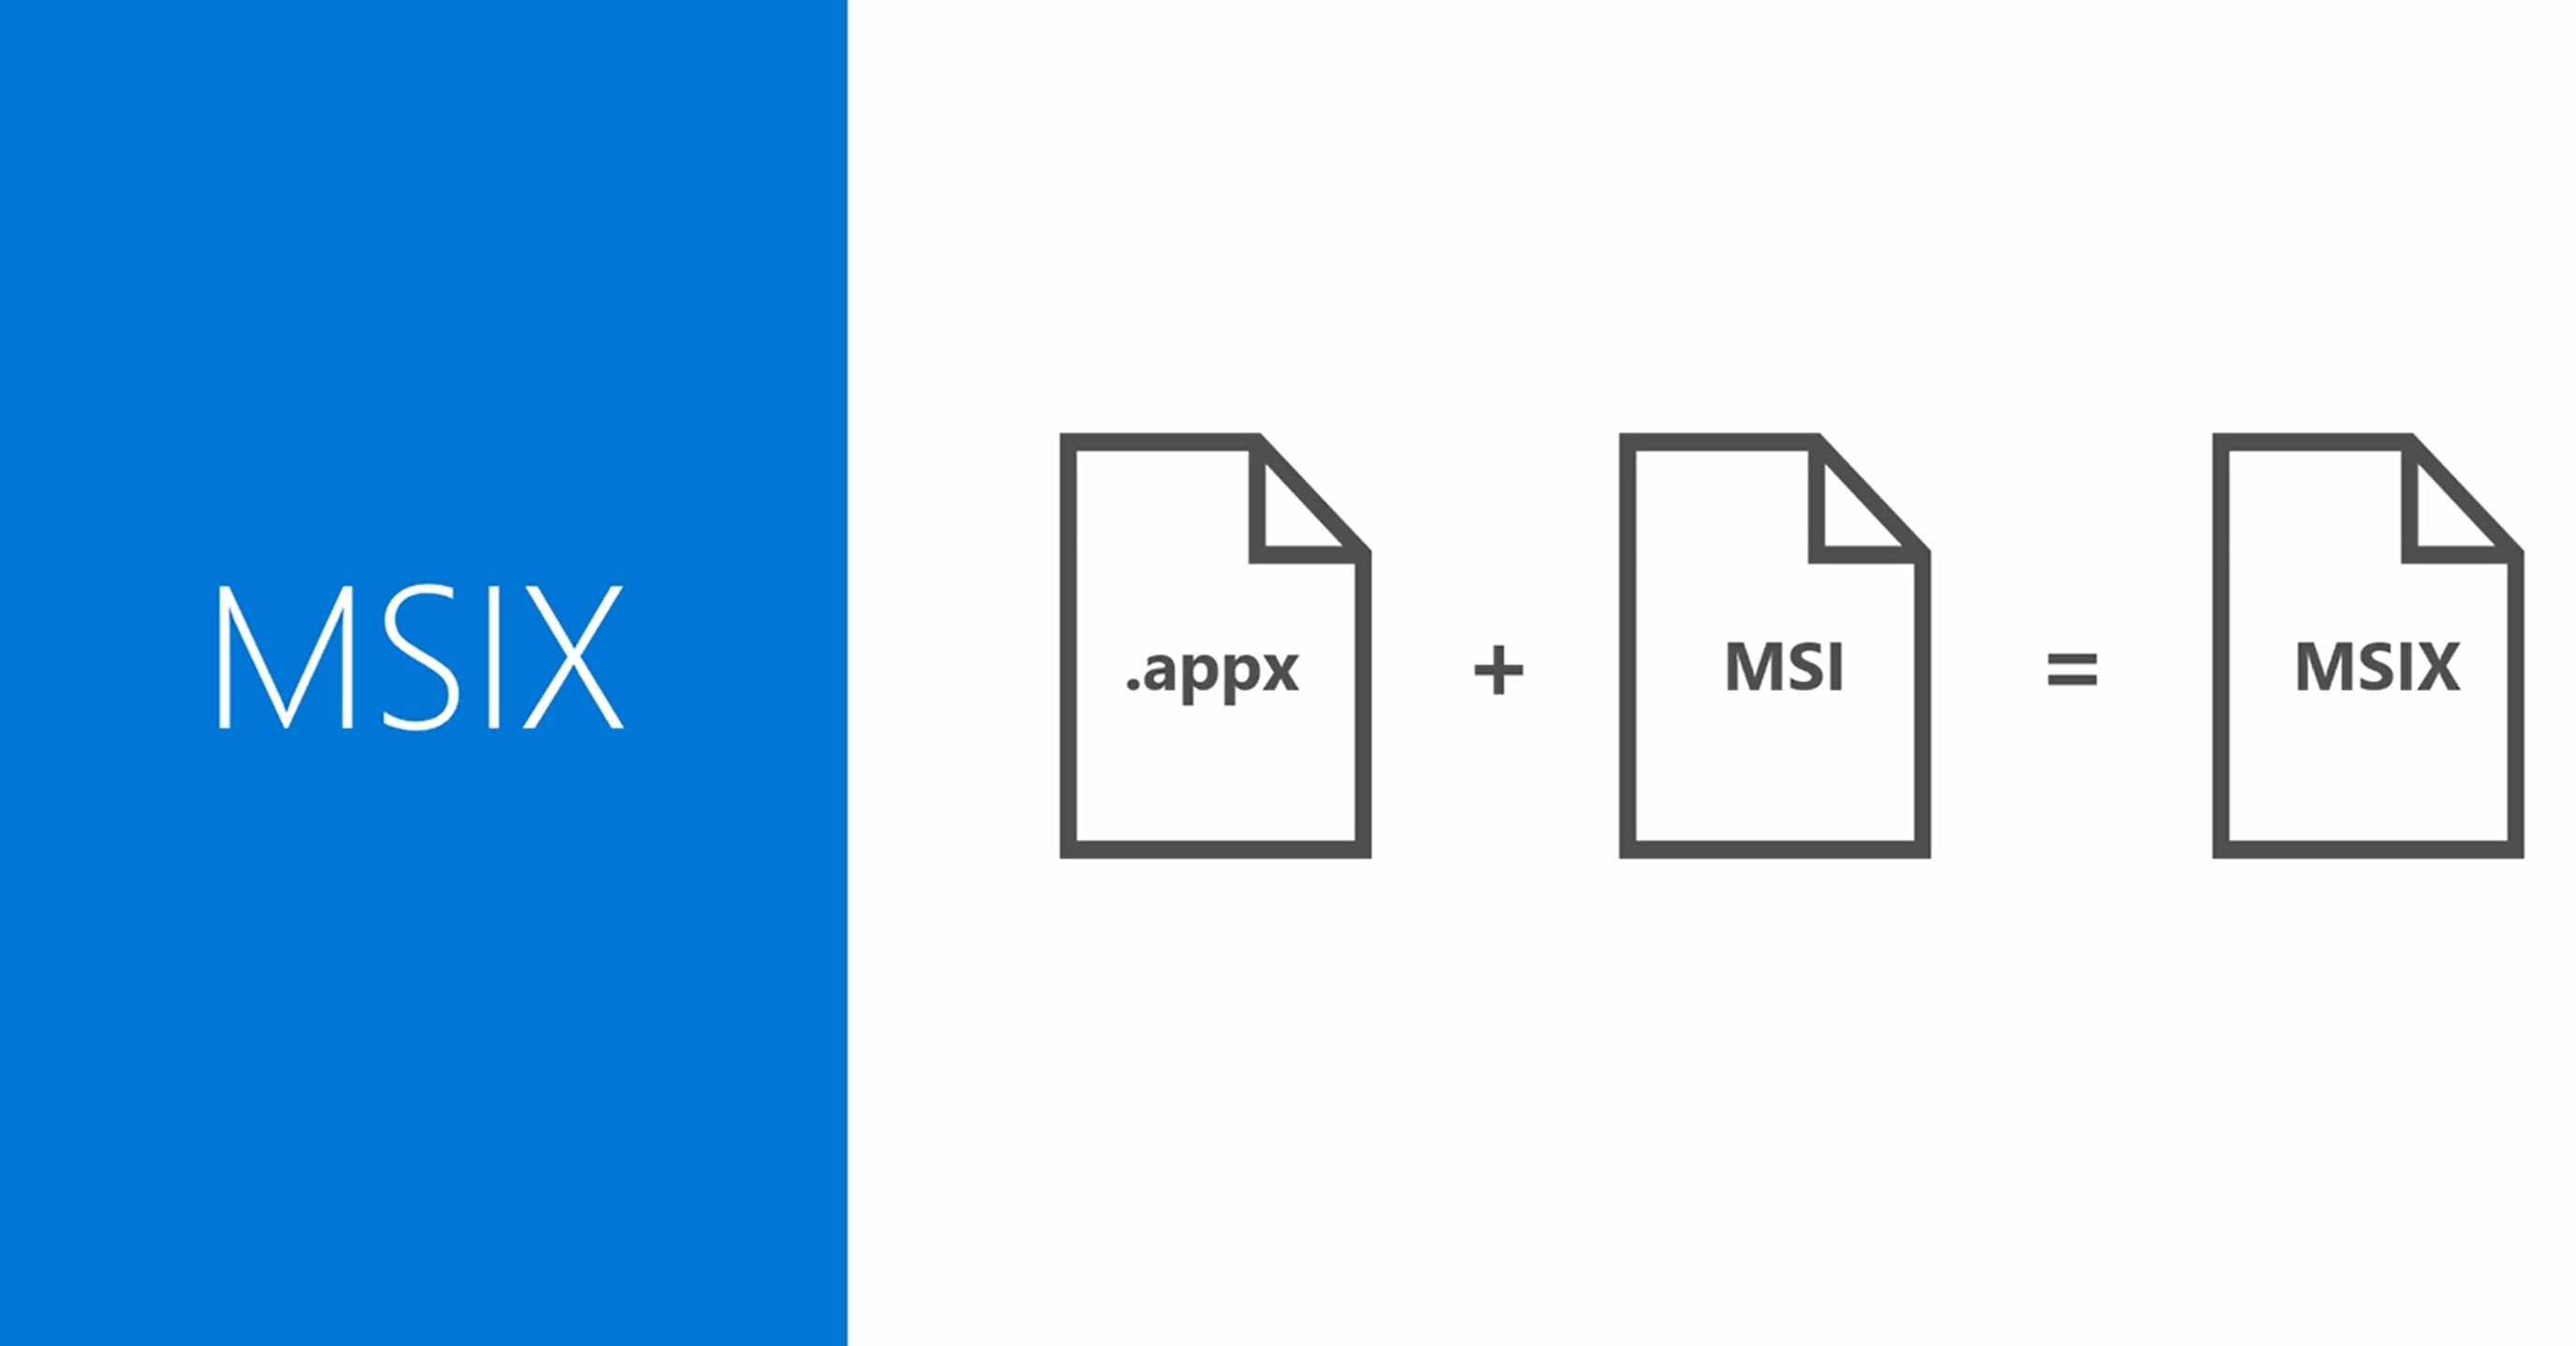
What is MSIX? It is a new app packaging format for Windows applications that supports Win32, WPF, and WinForm apps! Better yet, it provides built in download page, certificate support, and most importantly... automatic updates!!! I was blown away when I read this and was determined to figure it out. Throughout the process I learned a lot about MSIX, .NET Core 3, WPF, and distribution. I have to say I AM A FAN! Before we package up an app, let's talk about the pros and cons of MSIX from my understanding:
MSIX Pros
- Works with any Win32, WPF, or WinForms apps (regardless if it is .NET Core 3)
- Enables seemless distribution to the Microsoft store
- Enable Side-Loading with Easy Download & Install Page
- Automatic App Updates
- Easily integrates with Continuous Integration
- Lights up some Windows 10 features like URI launching
MSIX Cons
- Only supports Windows 10 for "seemless install mode"
- Requires special tools on Windows 7/8 (MSIX Installer)
- Requires side-loaded app to be signed with cert (pretty standard, but not ideal for indie dev).
- Sandboxes app like a UWP app
With this in mind, let's package up our WPF .NET Core 3 app with MSIX!
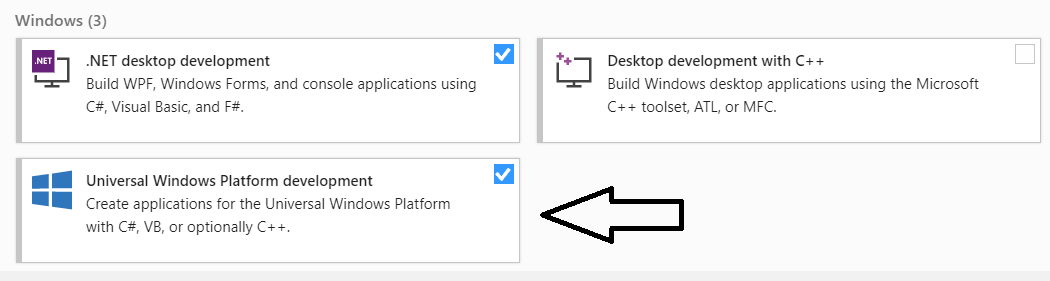
Install UWP!
That is right! We will need to install UWP as it contains all of the templates for MSIX packaging:
Windows Application Packaging Project
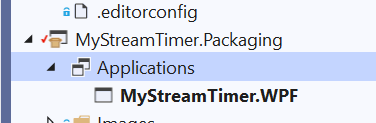
With UWP installed we can now add in the packaging project. Simply search for package and it will pop up:

When it is time to select the UWP platform I would recommend setting the minimum to 1803 and target to 1809.
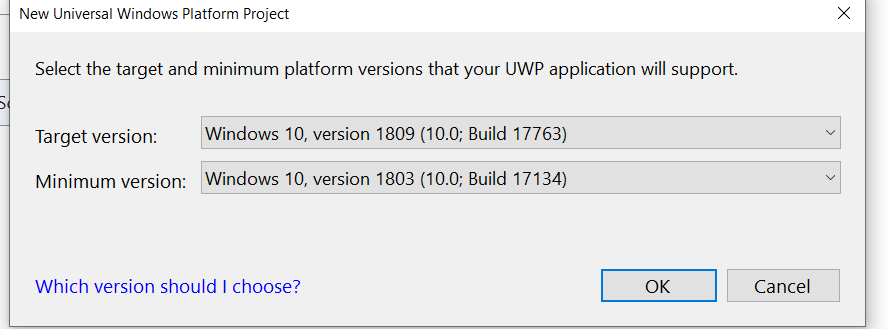
From what I can tell you can go farther back, but it is a bit more work
Add App Reference
Just like adding a normal reference to a library the package project can take a reference to another app project. This is how it knows what to bundle up:
Configure Platforms and Runtime Configurations
Inside of the WPF project there is a bit of work to do to configure it for x86 and x64. This is accomplished with the RuntimeIdentifiers attribute inside of the .csproj. In addition, we will want to setup a few platforms:
  <PropertyGroup>
    <!--Regular Settings-->
    <Platforms>AnyCPU;x64;x86</Platforms>
    <RuntimeIdentifiers>win-x64;win-x86</RuntimeIdentifiers>
  </PropertyGroup>

  <PropertyGroup Condition="'$(Configuration)|$(Platform)'=='Release|x64'">
    <PlatformTarget>x64</PlatformTarget>
  </PropertyGroup>

  <PropertyGroup Condition="'$(Configuration)|$(Platform)'=='Release|x86'">
    <PlatformTarget>x86</PlatformTarget>
  </PropertyGroup>

Setup App Info
Inside of the new packaging project we will find tons of settings and configurations for the new app. This includes a title, description, icons, capabilities, and a bunch more.
Some additional things that we can setup here are declarations such as a Protocol to support URI routing to the app. Here I will set it up so mystreamtimer: opens the app.

Distribute!
With just a few steps we are ready to distribute this app. We have a decision to make though. We can go directly to the Microsoft Store(or Business store), which only supports Windows 10, but handles all of our updates, certs, and store listing page for us. Or, we can distribute it ourselves and leverage an Azure App Service to host the app and automatically ship updates... Let's investigate and setup both! On the package project we can right click and go to Store, which gives us options on how to ship it.

Microsoft Store
This is actually the easiest part and since I have actually shipped UWP apps in the past the process was nearly identical. The first thing we will want to do is Associate App with the Store. This is a quick process once you have your Windows Dev account open. Then we can Create App Packages and say we want to create a new package for the app we just associated with from the store:
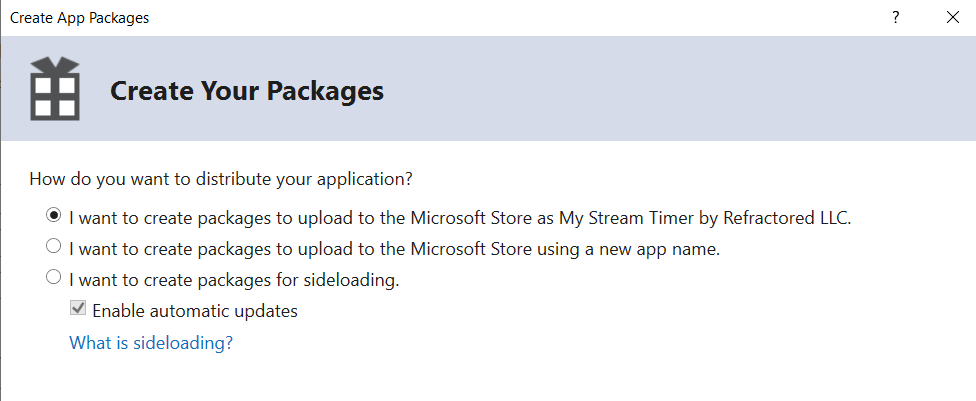
From here we just need to select our architectures (x86 and x64) and click on Create.
This will re-compile the app, package it up, and give us the app we need to upload to the Microsoft Store. It will also give us a test app and power shell script that we can run to test it locally.
Web Distribution & Sideloading
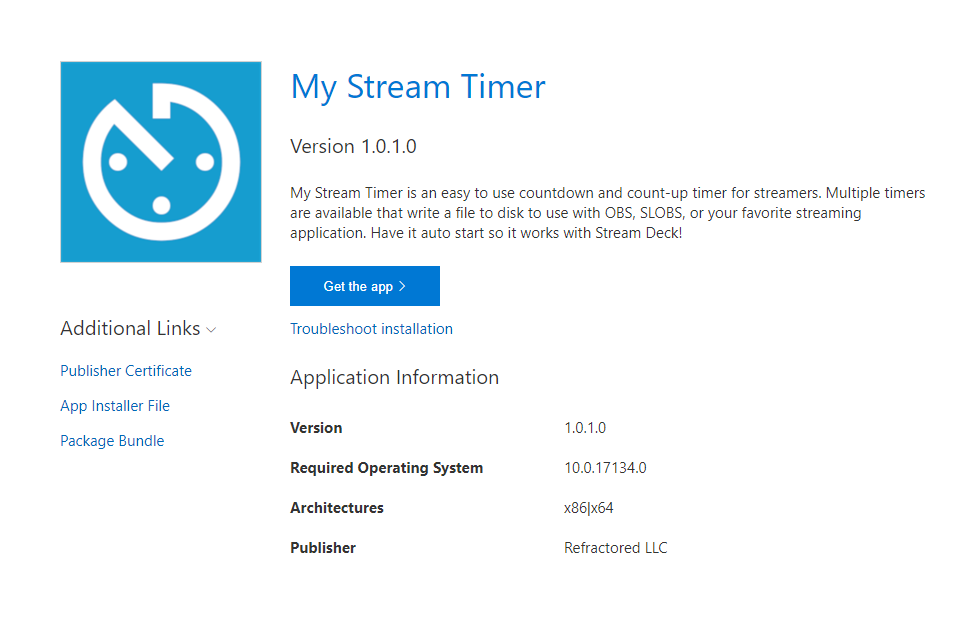
Now, on to the fun part of shipping our app with MSIX and bypassing the app store all together. This is cool because you can enable automatic updates, there is no review process, and it works! At the end of it you even get a cool website that gives you an install page such as this:
Create Sideloading Packages
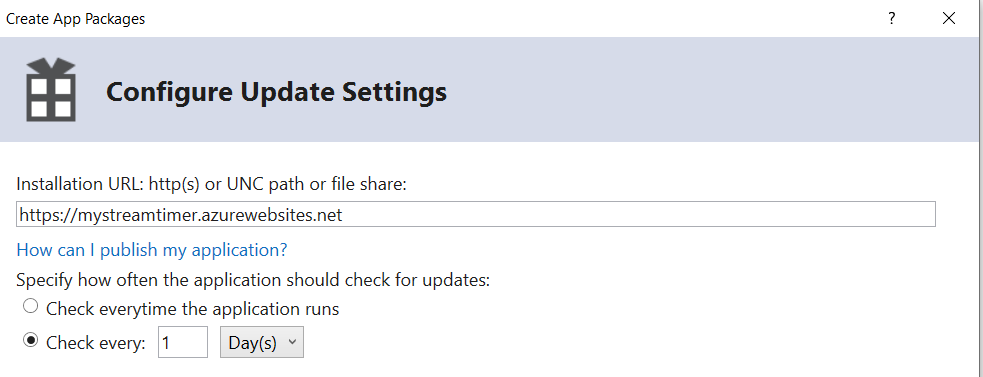
Instead of creating a package for the store we wil create one for sideloading. One nice feature is the checkbox to enable automatic updates!
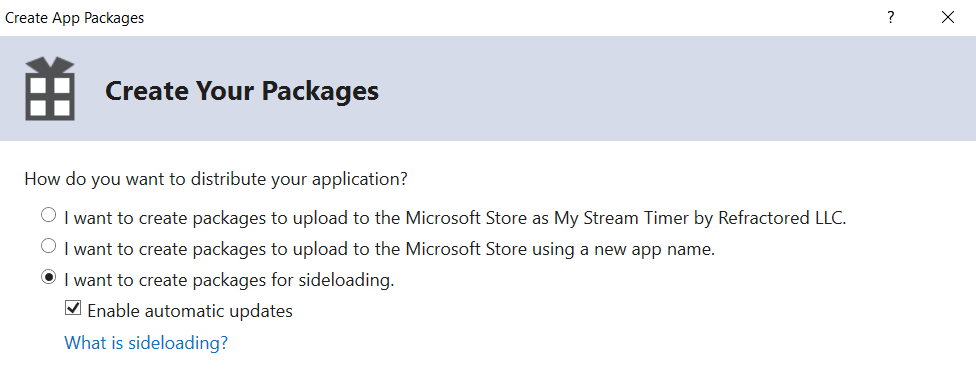
Just like the Microsoft Store version we will select x86 and x64 architectures for distribution. If you checked the box for automatic updates there is just a tiny bit more to setup such as where your hosting website or file share lives. AKA where are your storing your files for distribution. Then how often you want to check for updates.
Setup Backend
At this point you may not have your backend setup, so you will probably want to head over to Azure and setup a simple and cheap web app. It is crazy simple and only takes a few minutes to do so. They have great docs on how to configure everything on Azure. The most important part is setting the MIME types in your Web.config.
Upload Files
With the backend hosting site setup and the app package created we can upload all of the files to the server. This includes:
- index.html
- The full output folder for the build
- appinstaller file
I just used FTP to drag and drop in these files, but you could easily automate this process.
Install the App
Now, we have an awesome website with a big Get the app button that will download the app, install it, and check for updates!
You can test out my test server at https://mystreamtimer.azurewebsites.net/. Since I signed it with my test cert you will need to install it. If you are an enterprise or want to do this for real, you will need to buy a cert from someone like Digicert.
Gotchas
Here are a few things that got me when packaging with MSIX since the app is sandboxed.
- Saving files to LocalApplicationData actually saved it in a private location that the user couldn't easily get to. I used CommonApplicationData instead.
- Hard to test protocal URLs in WPF... have to parse generic StartupEventArgs.
- WPF apps can still run multiple instances, so we need to add a Mutex to stop that.
- Still need to sign the app with a cert for side-load deployment
Package Up Those Apps
All in all I was really happy with how this project turned out. You can browse the full source code on GitHub and download it from the Microsoft Store today!