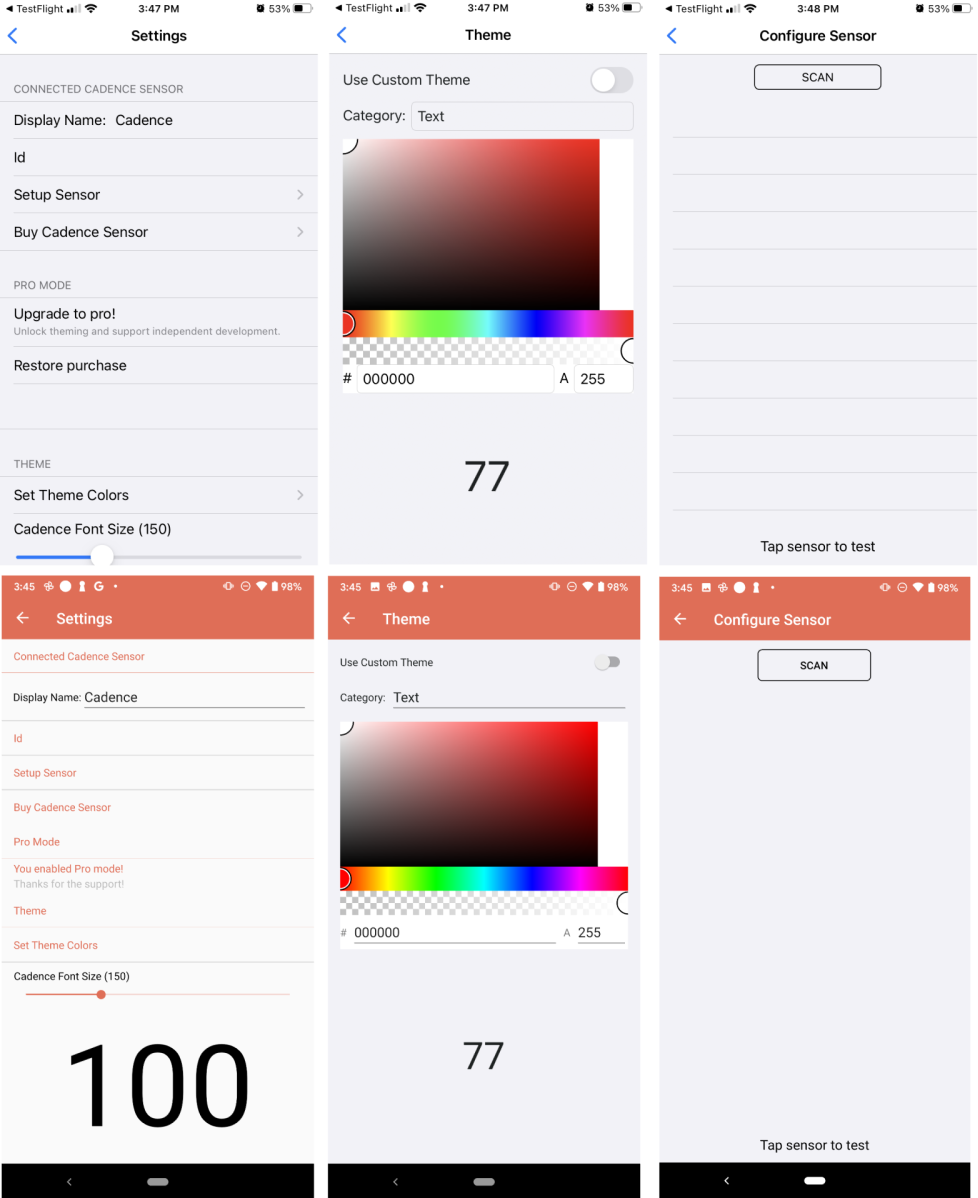
It seems like it was just yesterday that I was writing up a blog post on how I was launching My Cadence for iOS and then blogging about how I wrote and shipped the app in under a week. Well, it wasn't yesterday, but it was just 5 days ago! After I shipped the iOS version, I was watching some HGTV on Hulu and thought to myself, "how long would it take me to ship this app on Android?". The answer is around 4 hours' worth of work, and about 4 days of waiting for Google Play to approve my application for testing and publishing. Just like that it is live on Google Play for your Android device!

Enabling Android Support
I can't think of a real reason I decided to enable Android support for My Cadence. I guess maybe I was just board on my first day of holiday break and wanted a quick challenge. It was as if as soon as the challenge started, I was already done thanks to Xamarin and all of the amazing cross-platform libraries I had used.
When I started the iOS app, I kept things quite simple all in a single project and everything in the code behind. So, the first thing I needed to do was to break thing out into a .NET Standard library and ensure I didn't have any iOS specific code in the code behind.

This took all of 15 minutes or so and I was ready for the next task of seeing if everything "just worked".
Bluetooth Differences
Let's just say everything was close to working out of the box. The biggest difference is that on Android using and managing Bluetooth require the user to give location permissions. This is the oddest thing ever, however unless you use some newer APIs this is how it has to be done even though location isn't used at all. I created a small interface and used Xamarin.Essentials to access Permissions on Android.
public async Task<PermissionStatus> CheckAndRequestLocationPermission()
{
    var status = await Permissions.CheckStatusAsync<Permissions.LocationWhenInUse>();

    if (status == PermissionStatus.Granted)
        return status;

    await MyApp.Current.MainPage.DisplayAlert("Permission required", "Location permission is required for bluetooth scanning. We do not store or use your location at all.", "OK");

    status = await Permissions.RequestAsync<Permissions.LocationWhenInUse>();

    return status;
}
The reason I put this into an interface and used the dependency services is because I don't need to request these permissions on iOS. If I had left the code in the .NET Standard library than I would have needed to add the rationale into the info.plist. The linker is smart, but not that smart.
In-App Purchases
I love and hate in-app purchases. Mostly because they are a pain to implement, test, and keep up to date. Luckily, I just went through a new re-write of my plugin for billing that handles everything for you.
The only bit of code that I needed to add was the new "AcknowledgePurchase" method after the user has purchased the item.
 if(DeviceInfo.Platform == DevicePlatform.Android)
    await CrossInAppBilling.Current.AcknowledgePurchaseAsync(purchase.PurchaseToken);
The next hardest part was trying to test it. You MUST put it in an open or closed beta/alpha release to test this in Google Play. These must be "reviewed" and can take several days to do. The internal track doesn't work at all for this and only works once you publish your app. It has been a while since I published a new Android app, and I was shocked at how long this took. However, after it is all said and done everything worked!
Theming Differences
The biggest difference between iOS and Android has to do with the theme colors. I support light and dark modes in the app and on iOS I keep it all simple styling. However, on Android the ActionBar on top really likes to be colored and the status bar background needs the background set. I pulled in a little code to style the status bar:
public void SetStatusBarColor(System.Drawing.Color color, bool darkStatusBarTint)
{
    if (Build.VERSION.SdkInt < Android.OS.BuildVersionCodes.Lollipop)
        return;

    var activity = Platform.CurrentActivity;
    var window = activity.Window;
    window.AddFlags(Android.Views.WindowManagerFlags.DrawsSystemBarBackgrounds);
    window.ClearFlags(Android.Views.WindowManagerFlags.TranslucentStatus);
    window.SetStatusBarColor(color.ToPlatformColor());

    if (Build.VERSION.SdkInt >= Android.OS.BuildVersionCodes.M)
    {
        var flag = (Android.Views.StatusBarVisibility)Android.Views.SystemUiFlags.LightStatusBar;
        window.DecorView.SystemUiVisibility = darkStatusBarTint ? flag : 0;
    }
}
Beyond that I just had to change a few settings for background colors and sizes of buttons and progress bars and then the app was ready to go. Here is a side by side of the app on Android and iOS.

It is amazing just how quick I could bring over this app. If you want to find out more information or download the app checkout mycadence.app.


