


You finish recording a demo, play it back, and notice that your camera bubble is sitting right on top of the button you were explaining. Or the recording looks good, but you want to zoom in on one little detail and switch to a different layout halfway through.
Trimming the beginning and end isn't going to fix that!
Today, I'm introducing Tiny Clips Studio (Preview) for macOS and Windows. It adds an editable recording workflow to Tiny Clips, the little menu bar and system tray app for screenshots, videos, and GIFs.
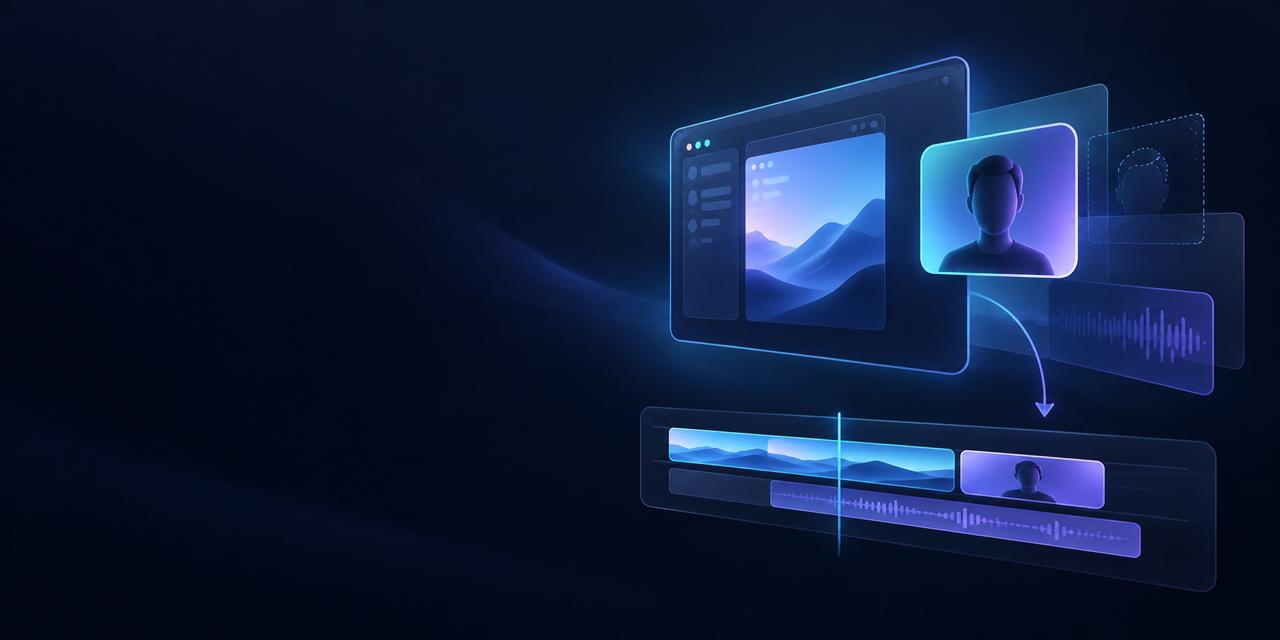
The idea is pretty straightforward: record now, choose the look afterward. Keep your screen and camera separate, arrange them in Studio, and create the final MP4 when you're ready to share. Want a different look later? Reopen the project and change it.
Here is a quick look at Studio in action:
A 45-second overview with music and no narration, showing editable screen and camera layers, layouts, zooms, cuts, and export. It combines real editor controls with illustrative compositions; preview capabilities vary by platform.
Download Tiny Clips for macOS and Windows, then enable Settings > Studio > Tiny Clips Studio (Preview).
Let's take a look at what had to change in the recording pipeline, how two native apps agree on a project, and some of the decisions that went into building the editor.
From a recording to a project
The biggest change in Studio happens before you ever touch an editing control.
An ordinary Tiny Clips recording produces a finished video. On Windows, the camera and overlays are drawn into the frames while recording. On macOS, the screen and camera are captured separately, but the normal workflow combines them after recording. Either way, by the time you start trimming, you're working with one flattened picture.
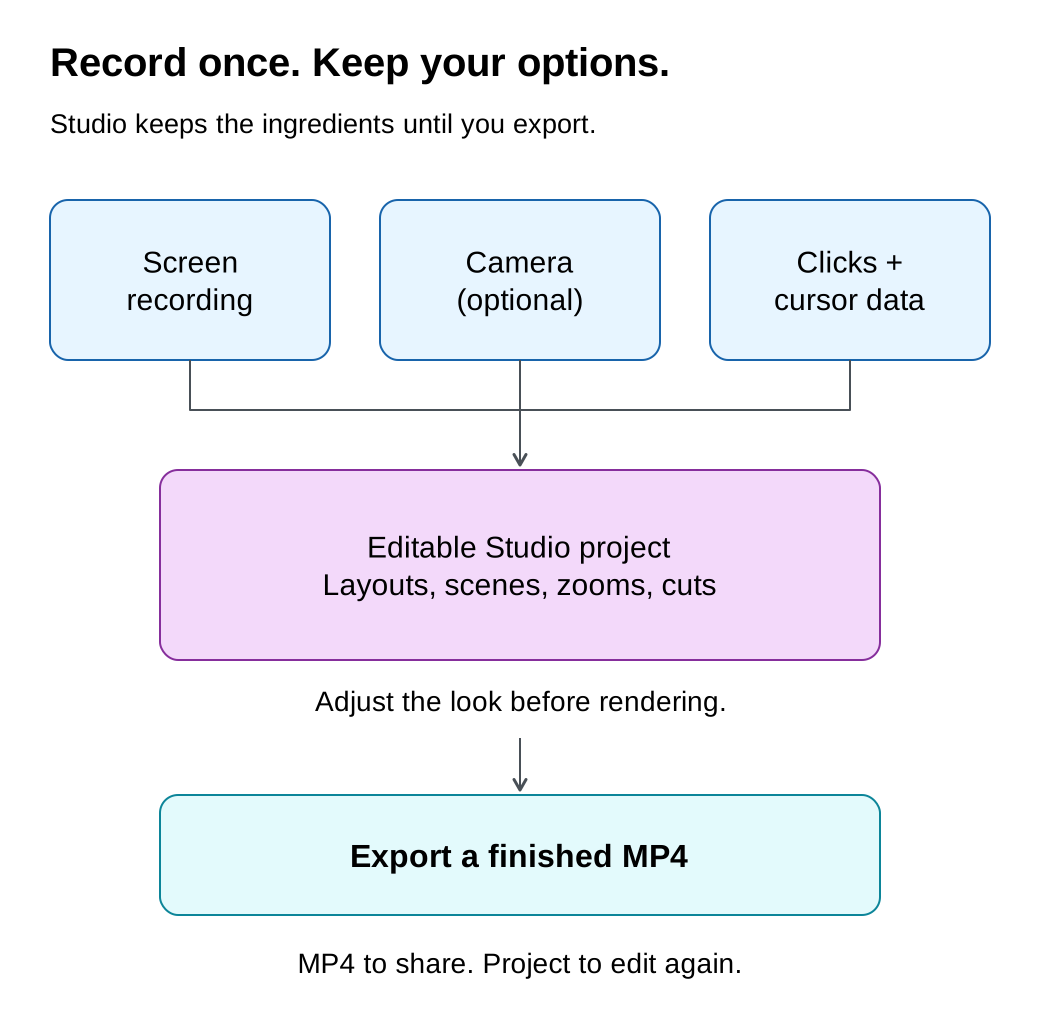
Studio takes a different path. A Studio recording keeps:
- The screen recording, without the camera composited on top.
- A separate camera recording, when you include your webcam.
- Cursor and click timing data, for features such as zoom suggestions.
- Project settings, describing the layout, styling, and edits.
Instead of immediately combining everything, Studio opens those pieces in an editor. The final composition is rendered when you export.
That is what makes moving the camera after recording possible. It isn't trying to erase a camera bubble from an existing video. The screen underneath was kept in the first place.
One important distinction: Studio needs those original pieces. It doesn't magically separate the webcam from an older, flattened MP4.
Give the recording a look, then tell the story
You can start with a screen-only layout, add a camera bubble, put the screen and camera side by side, or switch to camera only. Change the background, padding, and rounded corners, then adjust the camera's size, position, and shape.
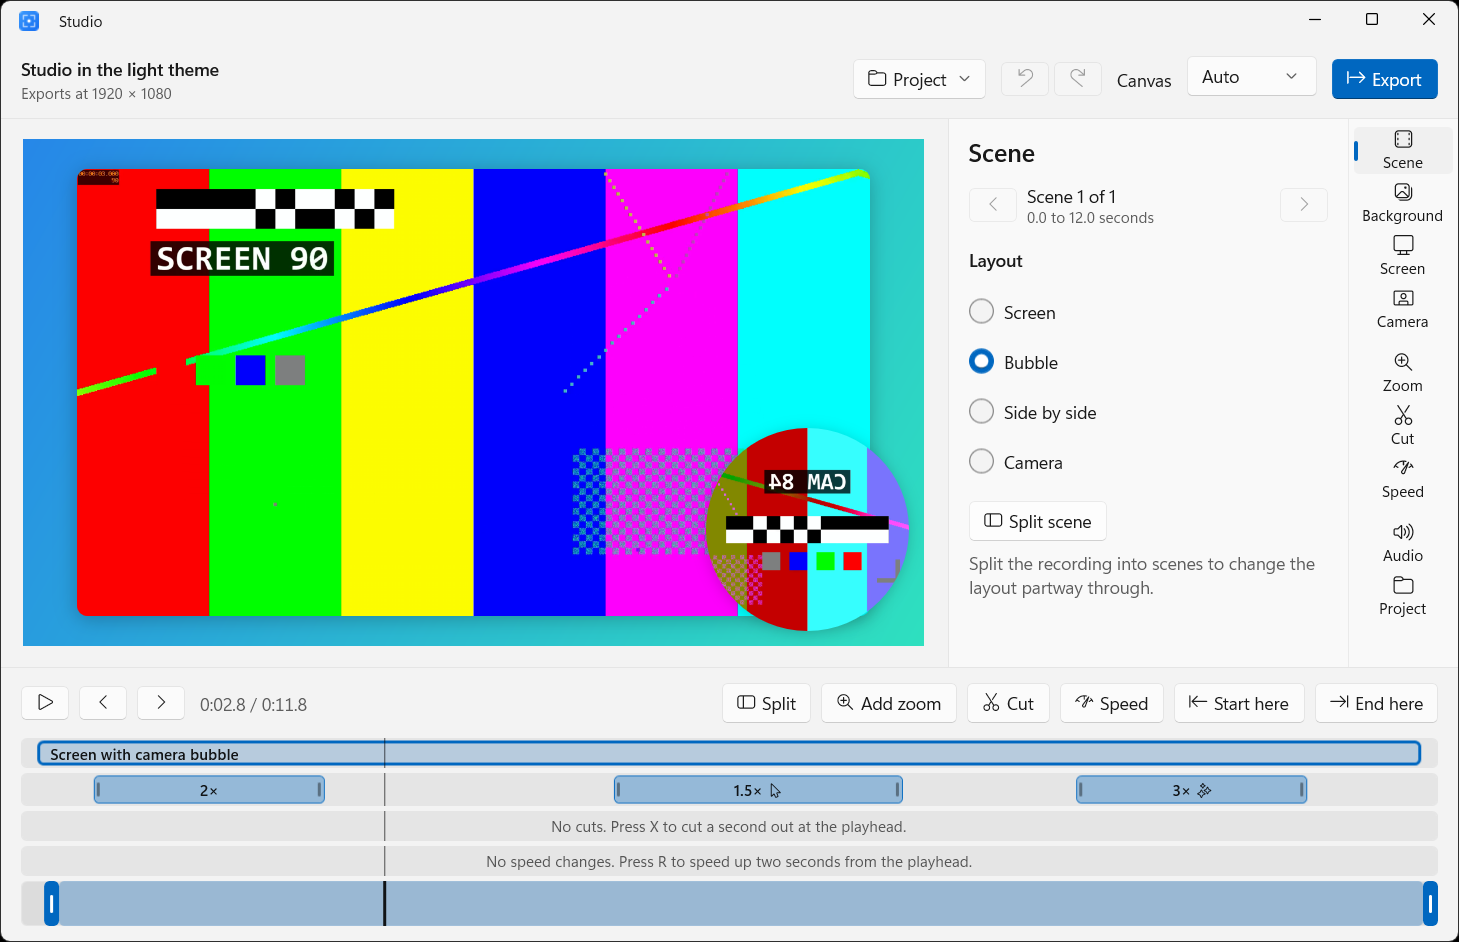
For a quick demo, that might be all you need: record, frame it nicely, trim, and export. No need to turn every clip into a production.
But the layout doesn't have to stay the same for the entire video. Scenes let different parts of a recording use different arrangements. For example, you could open with the camera, switch to the screen with a small camera bubble for the walkthrough, and finish side by side. Transitions can be instant or animated.
There are also timeline tools for zooms, cuts, and speed changes. Zoom in on the setting you're explaining, cut out a pause, or speed through a repetitive step. Zooms can focus on a fixed point or follow the pointer when that recording includes pointer data. Click-based suggestions give you a starting point that you can adjust rather than committing you to an automatic edit.

This is still a preview, and the two platforms aren't identical in every detail. Audio controls, camera background effects, and playback behavior have platform-specific limitations. The Studio development pull request tracks the implementation and known issues; the shared project design isn't a promise that every preview control behaves identically on both systems.
One design, two native implementations
For the developers out there, this is where the project gets interesting.
Studio wasn't built by putting the same web editor inside both apps. The Mac implementation uses Swift and SwiftUI, with AVFoundation and Core Image handling composition and rendering. Windows uses C# and WinUI 3, with Direct3D/Direct2D rendering and Media Foundation for video processing.
Different stacks, but they need to agree on what a project means.
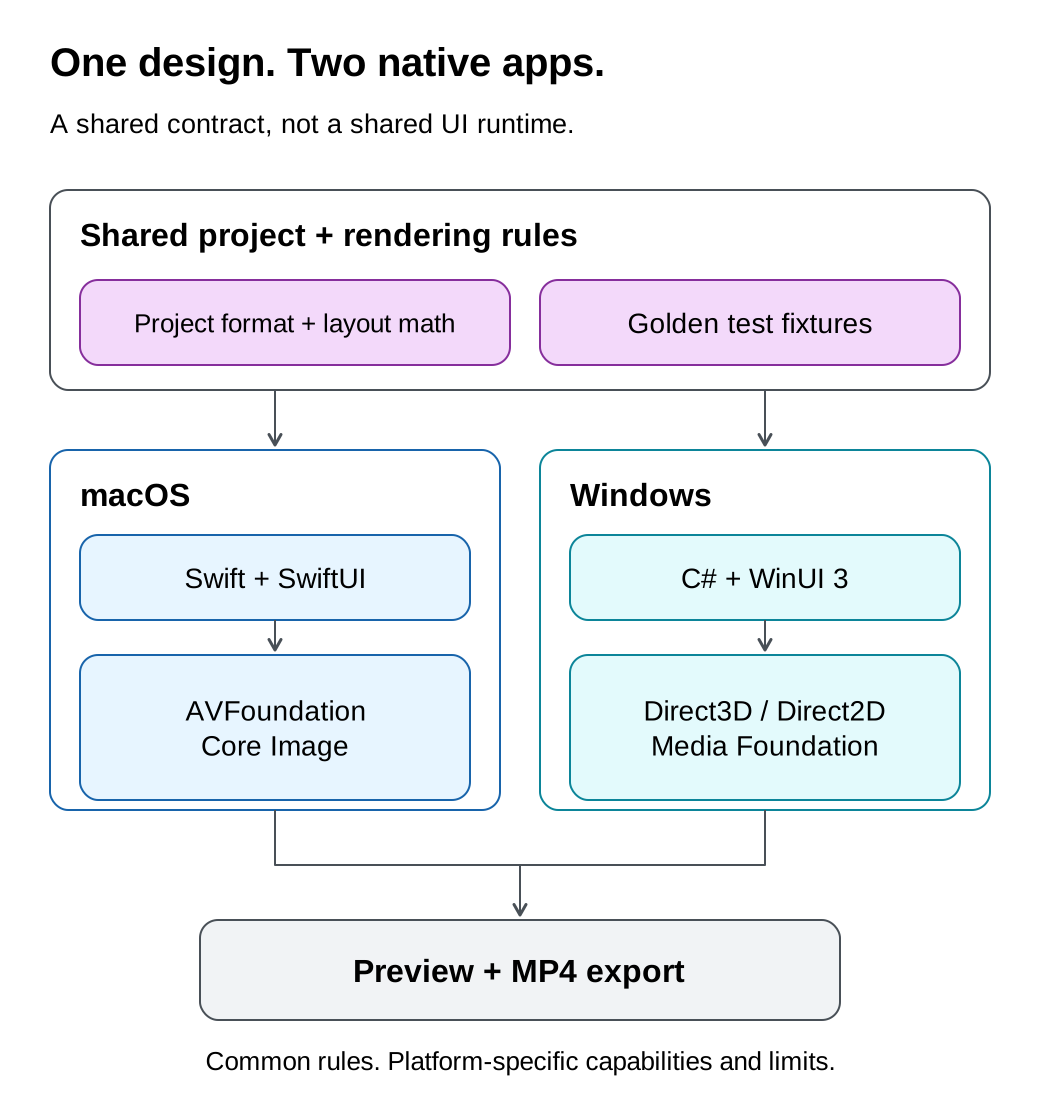
The foundation is a shared project format and rendering specification. Layout positions use normalized coordinates rather than assuming a particular recording resolution. Edits refer to the source recording's timeline, and a time map handles the relationship between that timeline and the exported video after cuts and speed changes.
Why does that matter? Cutting out five seconds shouldn't require rewriting every zoom and scene that comes after it.
The layout resolver takes a project, a time, and a canvas size, then calculates what belongs in that frame. There is a Swift implementation and a C# implementation, checked against the same shared fixtures. The time mapping and zoom-suggestion logic use shared fixtures too.
That gives both implementations concrete examples to agree on, rather than relying on two screenshots that look roughly similar. It doesn't guarantee interchangeable projects or pixel-identical exports, but it makes the common rules testable.
Some of the most useful changes weren't rendering features
The development history starts in early October and includes plenty of work on renderers, exporters, and timelines. It also records the smaller decisions that shape what using Studio actually feels like.
For example, an early version had an "After recording" setting and a separate "Record for Studio" choice. That became one explicit entry point: Studio Recording... on the Mac and a Studio tile on Windows. Ordinary Video stays ordinary Video.
The inspector changed too. Instead of putting eleven sections in one long scroll, Studio uses a rail that opens one panel at a time: Scene, Background, Screen, Camera, Zoom, Cut, Speed, Audio, and Project. Selecting a zoom on the timeline brings up its controls. Dragging the camera opens the Camera panel.
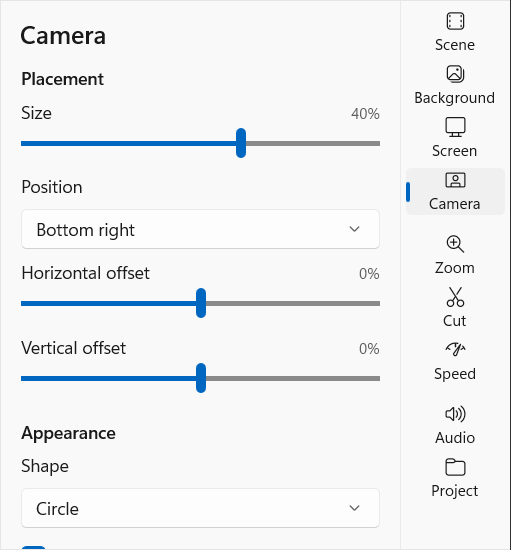
Those aren't flashy export features, but they save you from hunting through a wall of sliders.
Testing also had to go beyond compilation. One Windows inspector issue survived builds and unit tests because the problem only appeared when the actual window was constructed: a referenced UI style didn't exist. Opening and exercising the real window caught what the model tests couldn't.
The work includes shared data tests, rendered-frame checks, export checks, and Windows UI Automation. A build passing and an editor being usable are different questions, and the development notes deliberately distinguish what was compiled, what was checked automatically, and what someone actually tried.
Keep the project, not just the MP4
An export is the video you share. The project is what lets you come back and make another version.
Studio manages projects inside the app, but you can also save a project as a folder containing its recordings and a .tinyclips project file. Opening that file imports a copy as a new draft, leaving the saved folder alone.
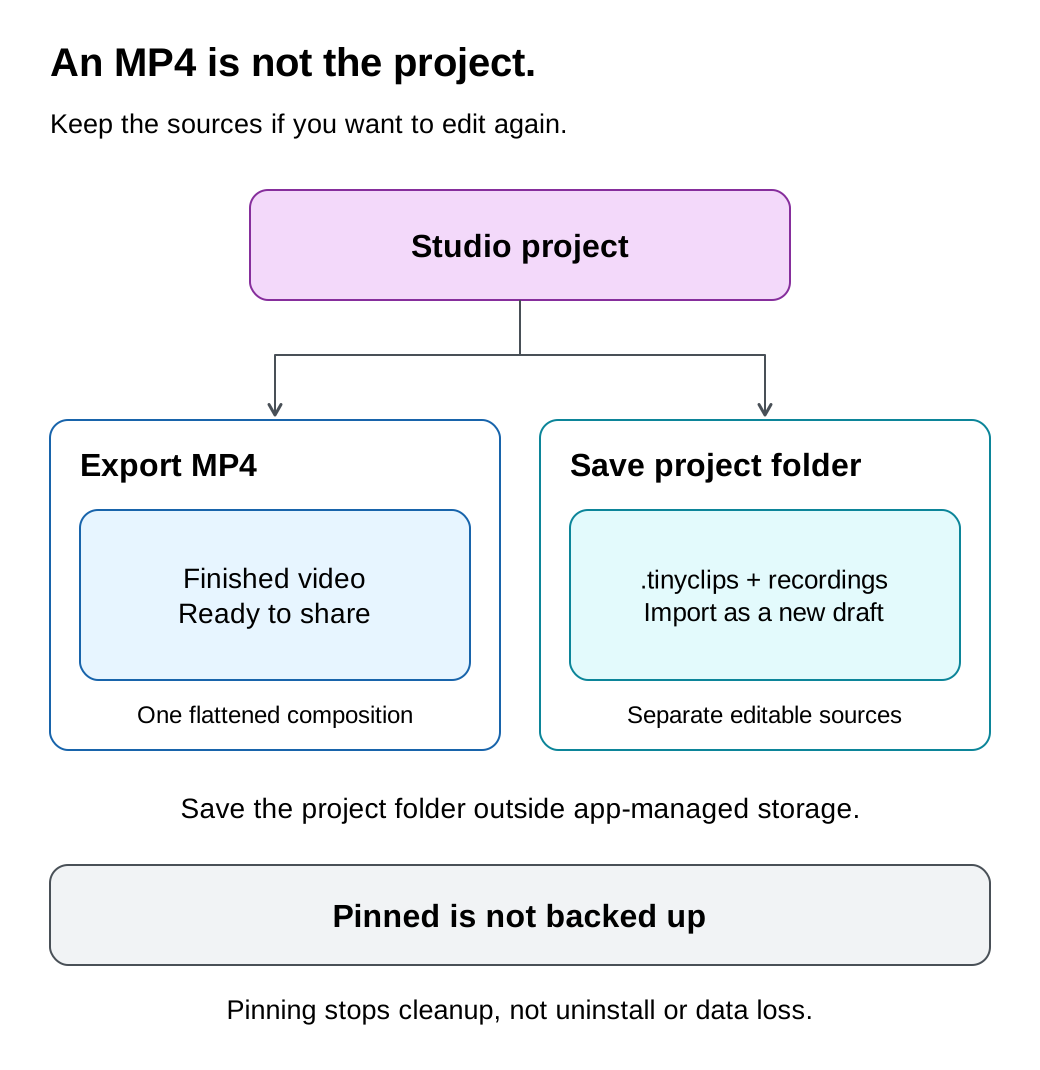
There is an important storage trade-off here: keeping editable recordings takes more space than keeping only the finished MP4.
By default, exported projects are eligible for cleanup after 30 days without use, with a 10 GB limit for cleanup-eligible projects. Drafts and projects marked Keep this project are protected from automatic cleanup. Those settings are adjustable.
Keep this project protects against Studio's cleanup; it isn't a backup. In particular, Windows stores its managed projects in the app's data folder, which can be removed when you uninstall or reset the app. Save a project folder somewhere you keep your work if you want to retain it independently of the installation.
And once Studio has cleaned up the source files, the exported MP4 still plays, but those separate editable layers are gone.
Try Studio Preview
Studio Preview is included in the new store releases for macOS and Windows. There is no separate Pro gate for Studio, and it is off by default.
To get started:
- Update Tiny Clips. You can find the downloads and store links at tinyclips.app.
- Open Settings > Studio.
- Turn on Tiny Clips Studio (Preview).
- On macOS, choose Studio Recording... from the menu bar menu. On Windows, choose the Studio tile in the tray menu.
- Record a short demo, arrange it in Studio, and export an MP4.
If you just want your usual recording workflow, keep using Video. Turning Studio on doesn't turn every video recording into a Studio project, and leaving it off keeps the ordinary workflow unchanged.
Explore the design and source
Want to dig into how it works? Here are a few useful places to start. The implementation links below point to the revision used for this write-up, while the pull request tracks ongoing preview work.
- Design and implementation notes: the milestones, product decisions, platform trade-offs, and hands-on testing history.
- Project format and layout math: how sources, scenes, zooms, timing, cleanup, and saved project folders fit together.
- Native implementations: macOS and Windows: follow the models, editing logic, preview, and rendering code.
- Shared test fixtures: concrete project inputs and expected results used to check the common rules.
- Studio development and preview status: the development history and known limitations as Studio evolves.
The diagrams are available as editable Excalidraw files too: recording workflow, native architecture, and projects versus exports.
Give Studio a try with a short recording, move the camera somewhere else after you've finished, and export a second version. That is the idea in one little experiment.
If something doesn't work as expected, or you have an idea that would make recording demos better, open an issue in the Tiny Clips repository. I'd love to hear what you create with it.